(2023年11月追記)AfterEffectsよりシンプルで簡単に作れるLottielabのバージョンの記事も書きました。
STEP 1. Illustratorで描いた絵をAfterEffectsで動かす
参考:https://helpx.adobe.com/jp/after-effects/how-to/jp-for-designers-1.html
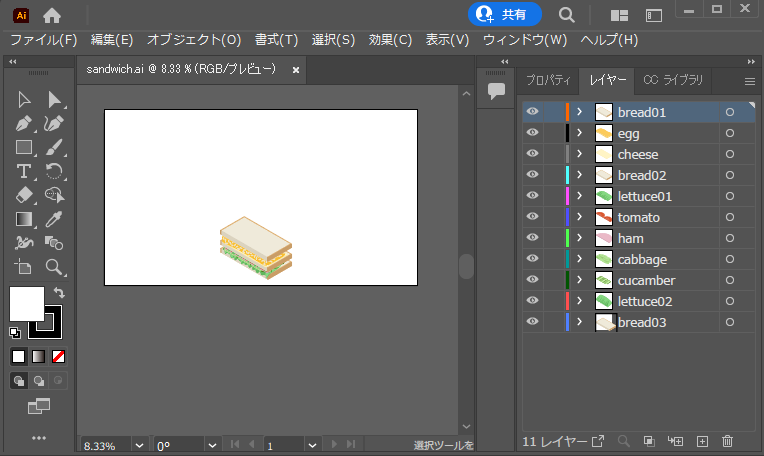
動かしたいオブジェクトごとにレイヤーに分ける
AfterEffectsで読み込むと、Illustratorのレイヤー=AfterEffectsのレイヤーになるので、動かしたいオブジェクトごとにレイヤーを分けます。
★デモのページを見るとわかるのですが、クリッピングマスクがかかっているレイヤーはLottie書き出し時にうまく動作しないようです★
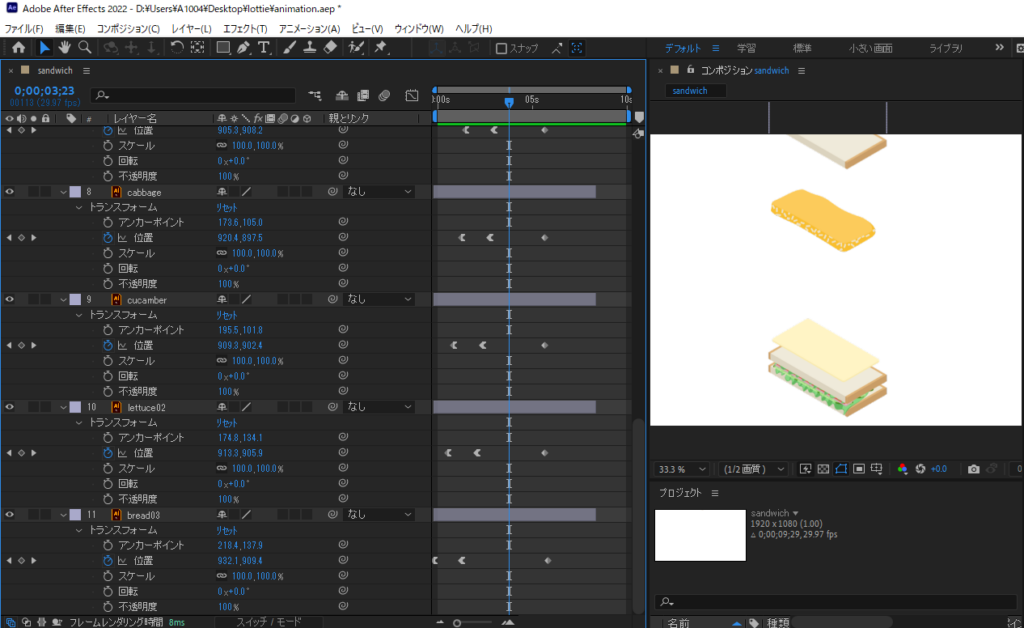
AfterEffects で動きを付ける
AfterEffectsの詳細な説明は省きます!
今回は位置のアニメーションのみを行ったのでシェイプレイヤーに変換する前に動きを付けていますが、シェイプレイヤーに変換→アニメーションを付けるほうがよいかも。
Illustrator レイヤーをシェイプレイヤーに変換する
シェイプレイヤーに変換しないとLottie化した時に画像がpngとして出力されてしまいます。
参考:https://helpx.adobe.com/jp/after-effects/how-to/convert-illustrator-layers-to-shape-layers.html
STEP 2. LottieJSONとして書き出す
参考: https://necco.co/note/7370
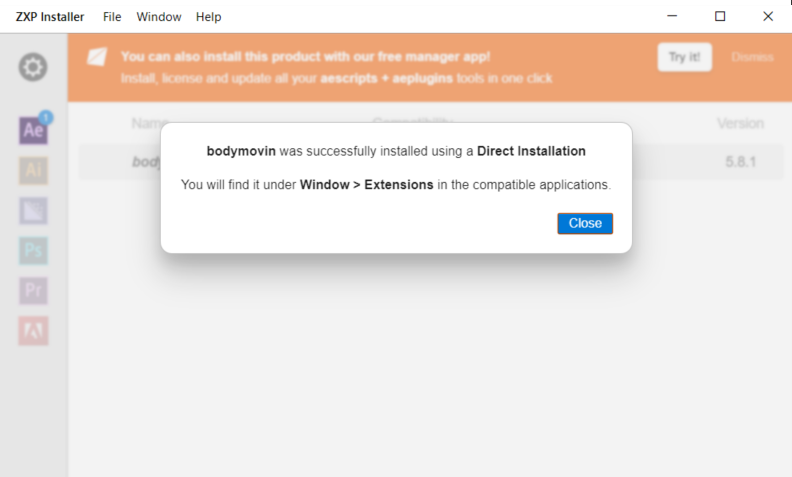
bodymovinを入れる
まずはAfterEffectsからLottieJSONを書き出すためのスクリプトをインストールします。
ZXP Installer https://aescripts.com/learn/zxp-installer/
bodymovin.zxp https://github.com/airbnb/lottie-web/blob/master/build/extension/bodymovin.zxp
環境設定の「スクリプトとエクスプレッション」にある「スクリプトによるファイルへの書き込みとネットワークアクセスを許可」のチェックを入れておきましょう(入れないと Windows環境ではRender Failedになる )
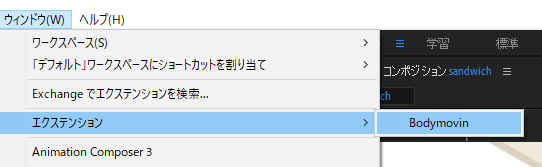
ウィンドウ → エクステンション → にBodymovinが入れば準備完了。
Bodymovin でエクスポートする
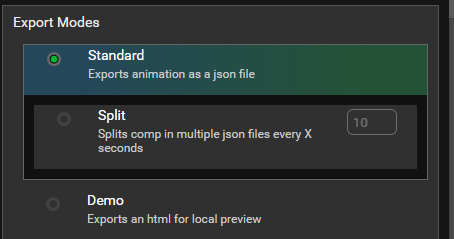
書き出したいコンポジションをSelected にしたら、Settingsで書き出しの設定を確認しましょう。

Standard、またはStandardとDemoの両方にチェックをしておきます。
続いて書き出したいコンポジション名の右端の … をクリックして、JSONファイルの保存先を設定します。
設定し終わるとこんな感じ。「Render」ボタンが押せるようになるので、「Render」ボタンをクリックします。
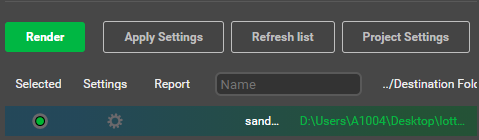
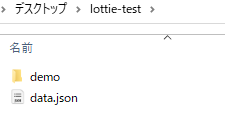
すると指定した保存先に、lottieのJSONファイルが保存されます。
STEP 3. Webページで簡単に動かす
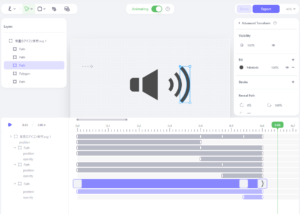
デモです。
lottie-player(単に再生するだけ)
下記のlottie-playerのコードのsrc=””の部分で、bodymovinで書き出したJSONファイルを指定するだけ!
    <script src="https://unpkg.com/@lottiefiles/lottie-player@latest/dist/lottie-player.js"></script>
    <lottie-player
            src="data.json"
            background="transparent"
            speed="1"
            style="width: 300px; height: 300px"
            loop
            autoplay
    ></lottie-player>
lottie.js(JavaScriptでいろいろしたいとき)
bodymovin.loadAnimationをつかってpathに書き出したJSONファイルを指定します。
<script src="https://cdnjs.cloudflare.com/ajax/libs/bodymovin/5.9.1/lottie.min.js"></script>
<div class="lottie-animation"></div>
<script>
        bodymovin.loadAnimation({
            container: document.querySelector(".lottie-animation"),
            path: "data.json",
            renderer: "svg"
        })
</script>
(おまけ)GSAPで全力で動かす
GSAPのScrollTriggerで、スクロール量に応じてLottieをコマ送りすることもできます!
参考:https://codepen.io/GreenSock/full/QWdjEbx
デモ:https://deep-space.blue/testing/lottie-testing/lottie-gsap/index.html
<div class="lottie-animation" id="animationWindow"></div>

<script src="https://cdnjs.cloudflare.com/ajax/libs/gsap/3.9.1/gsap.min.js"></script>
<script src="https://cdnjs.cloudflare.com/ajax/libs/gsap/3.9.1/ScrollTrigger.min.js"></script>
<script src="https://cdnjs.cloudflare.com/ajax/libs/lottie-web/5.8.1/lottie.min.js"></script>
<script>
    // https://codepen.io/GreenSock/full/QWdjEbx
    LottieScrollTrigger({
        target: "#animationWindow",
        path: "data.json",
        speed: "medium",
        scrub: 0
    });


    function LottieScrollTrigger(vars) {
        let playhead = {frame: 0},
            target = gsap.utils.toArray(vars.target)[0],
            speeds = {slow: "+=2000", medium: "+=1000", fast: "+=500"},
            st = {trigger: target, pin: true, start: "top top", end: speeds[vars.speed] || "+=1000", scrub: 1},
            animation = lottie.loadAnimation({
                container: target,
                renderer: vars.renderer || "svg",
                loop: false,
                autoplay: false,
                path: vars.path
            });
        for (let p in vars) {
            st[p] = vars[p];
        }
        animation.addEventListener("DOMLoaded", function() {
            gsap.to(playhead, {
                frame: animation.totalFrames - 1,
                ease: "none",
                onUpdate: () => animation.goToAndStop(playhead.frame, true),
                scrollTrigger: st
            });
            ScrollTrigger.sort();
            ScrollTrigger.refresh();
        });
        return animation;
    }

</script>
コメント