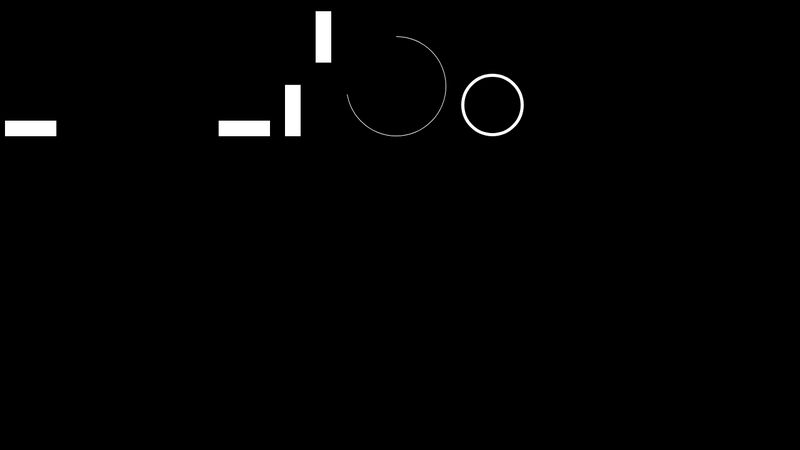
今回作成するのは以下の動画のように、円形の線が12時の方向から徐々に引かれていくアニメーションです!(基本的にJavaScriptが必要となるやり方になります)
目次
その1: SVG + GSAP
SVGの線の表示をGSAPで動かす方法です。
(半径の計算を手動でやればJavaScript無しでもできるかもしれない…)
ポイントは、SVGは90°回転させる必要があること。そのままだと線が横から始まってしまいます。
コードを表示
<a href="#" class="c-circle c-circle--01 js-circle-01">
    <svg width="40" height="40" viewBox="0 0 40 40" fill="none" xmlns="http://www.w3.org/2000/svg">
        <circle cx="20" cy="20" r="19.5" stroke="#ccc" stroke-width="1"/>
        <circle cx="20" cy="20" r="19.5" stroke="#000" stroke-width="1" class="js-circle-01-icon"/>
    </svg>
</a>
const funcCircle01 = () => {
const circles = document.querySelectorAll('.js-circle-01');
if (!circles.length) return;
circles.forEach((circle) => {
const circleIcon = circle.querySelector('.js-circle-01-icon');
const rLength = 2 * Math.PI * circleIcon.getAttribute("r");
let animation;
circleIcon.style.strokeDasharray = rLength;
circleIcon.style.strokeDashoffset = rLength;
//circleにマウスをのせたらアニメーションを起動
circle.addEventListener("mouseover", () => {
animation = gsap.fromTo(circleIcon, {
strokeDashoffset: rLength,
opacity: 1,
}, {
duration: 1,
strokeDashoffset: 0,
ease: CustomEase.create("custom", "M0,0 C0.49,0 1,0.99 1,1 "),
});
})
//マウスが外れたら停止する
circle.addEventListener("mouseout", () => {
animation.pause();
gsap.to(circleIcon, {
duration: 0.2,
opacity: 0
})
})
})
}
funcCircle01();.c-circle{
display: grid;
place-items: center;
width: 40px;
height: 40px;
border-radius:50%;
}
.c-circle::after{
grid-area: 1/1;
content: ">";
}
.c-circle:hover{
background-color: #000;
color: #fff;
transition: background-color .2s 1s,color .2s 1s;
}
.c-circle--01 svg{
grid-area: 1/1;
margin: -1px;
pointer-events: none;
transform: rotate(90deg); /*線の開始位置を12時の方向にする*/
}
その2:conic-gradientを@keyframesで動かす(iOS16.4以上)
conic-gradient(円錐グラデーション)を利用して線を表現する方法です。
コードを表示
<a href="#" class="c-circle c-circle--02"></a>.c-circle{
display: grid;
place-items: center;
width: 40px;
height: 40px;
border-radius:50%;
}
.c-circle::after{
grid-area: 1/1;
content: ">";
}
.c-circle:hover{
background-color: #000;
color: #fff;
transition: background-color .2s 1s,color .2s 1s;
}
.c-circle--02{
border:solid 1px #ccc;
}
.c-circle--02::before{
grid-area: 1/1;
display: block;
content: "";
width:calc(100% + 1.6px);/* Winのスケーリング 150%の時のズレの計算用で2ではなく1.6にしている */
height:calc(100% + 1.6px);
border-radius:50%;
background: conic-gradient(from 0deg, #000 var(--deg1,0deg), #000 var(--deg2,0deg), rgba(0, 0, 0, 0.00) var(--deg3,0deg), rgba(0, 0, 0, 0.00) var(--deg4,360deg));
/* マスクで線だけを表示させる処理 */
-webkit-mask-image :url(circle.svg), -webkit-gradient(linear, left top, left bottom, from(#000), to(#000));
-webkit-mask-size:calc(100% - 2px),100%;
-webkit-mask-position:center,center;
-webkit-mask-repeat:no-repeat,no-repeat;
/*ff*/
mask-composite: exclude;
/*chrome, safari*/
-webkit-mask-composite: xor;
}
.c-circle--02:hover::before{
animation: conic 1s cubic-bezier(.49,0,1,.99) forwards;
}
@property --deg1 {
syntax: "<angle>";
initial-value: 0deg;
inherits: false;
}
@property --deg2 {
syntax: "<angle>";
initial-value: 0deg;
inherits: false;
}
@property --deg3 {
syntax: "<angle>";
initial-value: 0deg;
inherits: false;
}
@property --deg4 {
syntax: "<angle>";
initial-value: 0deg;
inherits: false;
}
@keyframes conic{
from{
--deg1:0deg;
--deg2:0deg;
--deg3:0deg;
--deg4:361deg;
}
to{
--deg1:0deg;
--deg2:361deg;
--deg3:361deg;
--deg4:361deg;
}
}@property はiOS16.4以上で使えます。Can I Use…
利用しているマスクの説明は、『【CSS mask-image】SVGを使ったクリッピングマスクのサイズや位置を自由に調整したい!』 で解説しています。
その3:conic-gradientをGSAPで動かす
conic-gradientをCSSで動かせるのはiOS16.4以上なので、代わりにJavaScriptで動かす方法です。
(GSAPを利用します)
コードを表示
<a href="#" class="c-circle c-circle--03 js-circle-03">
    <span class="c-circle--03__circle js-circle-03-icon"></span>
</a>
.c-circle{
display: grid;
place-items: center;
width: 40px;
height: 40px;
border-radius:50%;
}
.c-circle::after{
grid-area: 1/1;
content: ">";
}
.c-circle:hover{
background-color: #000;
color: #fff;
transition: background-color .2s 1s,color .2s 1s;
}
.c-circle--03{
border:solid 1px #ccc;
}
.c-circle--03__circle{
grid-area: 1/1;
display: block;
content: "";
width:calc(100% + 1.6px);/* Winのスケーリング 150%の時のズレの計算用で2ではなく1.6にしている */
height:calc(100% + 1.6px);
border-radius:50%;
pointer-events: none;
/* マスクで線だけを表示させる処理 */
-webkit-mask-image :url(circle.svg), -webkit-gradient(linear, left top, left bottom, from(#000), to(#000));
-webkit-mask-size:calc(100% - 2px),100%;
-webkit-mask-position:center,center;
-webkit-mask-repeat:no-repeat,no-repeat;
/*ff*/
mask-composite: exclude;
/*chrome, safari*/
-webkit-mask-composite: xor;
} const funcCircle03 = () => {
const circles = document.querySelectorAll('.js-circle-03');
if (!circles.length) return;
circles.forEach((circle) => {
const circleIcon = circle.querySelector('.js-circle-03-icon');
let animation;
//circleにマウスをのせたらアニメーションを起動
circle.addEventListener("mouseover", () => {
animation = gsap.fromTo(circleIcon, {
background:
"conic-gradient(black 0deg, black 0deg, transparent 0deg, transparent 360deg)",
opacity:1,
},
{
background:
"conic-gradient(black 0deg, black 360deg, transparent 360deg, transparent 360deg)",
ease: CustomEase.create("custom", "M0,0 C0.49,0 1,0.99 1,1 "),
duration: 1,
});
})
//マウスが外れたら停止する
circle.addEventListener("mouseout", () => {
animation.pause();
gsap.to(circleIcon, {
duration: 0.2,
opacity: 0
})
})
})
}
funcCircle03();その4:canvasで円を描画する
円をcanvasに描画する方法です。
コードを表示
<a href="#" class="c-circle c-circle--04 js-circle-04">
    <canvas class="c-circle--04__circle js-circle-04-icon" width="40" height="40"></canvas>
</a>
.c-circle{
display: grid;
place-items: center;
width: 40px;
height: 40px;
border-radius:50%;
}
.c-circle::after{
grid-area: 1/1;
content: ">";
}
.c-circle:hover{
background-color: #000;
color: #fff;
transition: background-color .2s 1s,color .2s 1s;
}
.c-circle--04{
border:solid 1px #ccc;
}
.c-circle--04__circle{
grid-area: 1/1;
margin:-1px;
display: block;
opacity: 0;
pointer-events: none;
}
.c-circle--04:hover .c-circle--04__circle{
opacity: 1;
transition: opacity .2s;
} const funcCircle04 = () => {
const circles = document.querySelectorAll('.js-circle-04');
if (!circles.length) return;
circles.forEach((circle) => {
const circleIcon = circle.querySelector('.js-circle-04-icon');
//canvasの設定
const canvas = circleIcon;
const ctx = canvas.getContext("2d");
//アニメーション設定用の準備
let deg = 1;
let acrInterval;
const posX = canvas.width / 2;
const posY = canvas.height / 2;
const lineW = 1;
const color = '#000';
const r = posX - lineW / 2;
const percent = 360 / 100;
const result = percent * 100;
// アニメーション時間(ミリ秒)
const duration = 1000;
// アニメーションの開始時間を格納する変数
let startTime;
/**
* イージング関数
* @param x
* @returns {number}
*/
function easeInQuart(x) {
return x * x * x * x;
}
ctx.lineCap = 'round';
circle.addEventListener("mouseover",()=>{
startTime = Date.now();
drawing();
})
circle.addEventListener("mouseout",()=>{
cancelAnimationFrame(acrInterval);
deegres = 1;
})
function drawing() {
// 現在時間の継続時間に対する進捗度を算出
const progress = Math.min(1, (Date.now() - startTime) / duration);
//イージング関数の実行
deg = easeInQuart(progress) * 360;
//canvas描画の準備
ctx.clearRect( 0, 0, canvas.width, canvas.height );
ctx.beginPath();
ctx.strokeStyle = color;
ctx.lineWidth = lineW;
ctx.arc( posX, posY, r, (Math.PI/180) * 270, (Math.PI/180) * (270 + deg) );
ctx.stroke();
if( deg <= result ){
acrInterval = requestAnimationFrame(drawing);
}else{
cancelAnimationFrame(acrInterval);
deg = 1;
}
}
})
}
funcCircle04();イージング関数の部分はイージング関数チートシートで探して別のものに置き換えて使えます。
その他の実装アイディア
今回まとめには含めませんでしたが、そのほかにもCSSのみで線が引かれていくように見せる方法がありました。
borderの引き方を工夫して徐々に線が引かれていくように見せる
「12時の方向から徐々に線が引かれる」のとは若干違ったため今回は使いませんでしたが、CSSだけでできるテクニックです。
引かれている線を別の要素で隠し、隠し方を変更していくことで線が引かれていくように見せる
以下のCode pen右から2つ目の円です。
今回は円の背景が透けて欲しかったため使いませんでしたが、単色の場合はCSSだけで実装できるテクニックです。

コメント